Friday, September 3, 2010

Super Mario Birthday

A what? Super Mario you say? Well... that's just.... super.

*panic*

Why panic? I'm crafty. I can pull off a little Super Mario shindig... 2 days after returning from 2 weeks of vacation with a pile of laundry, no groceries, and a job to return to the day after. Sure. I'll just need a few supplies.


Luckily I had my sister and my husbands sister to pick up the slack for me and I just had a few details to rock out the night before... Speaking of rocking out, my sister-in-law made the most amazing cake for the small mister. The cake made the party... and was the only real "Super Mario" reference at all. Turns out all you need for a successful kids party is a bounce house and cool cake. My husband put up the bounce house and my sister-in-law created this:


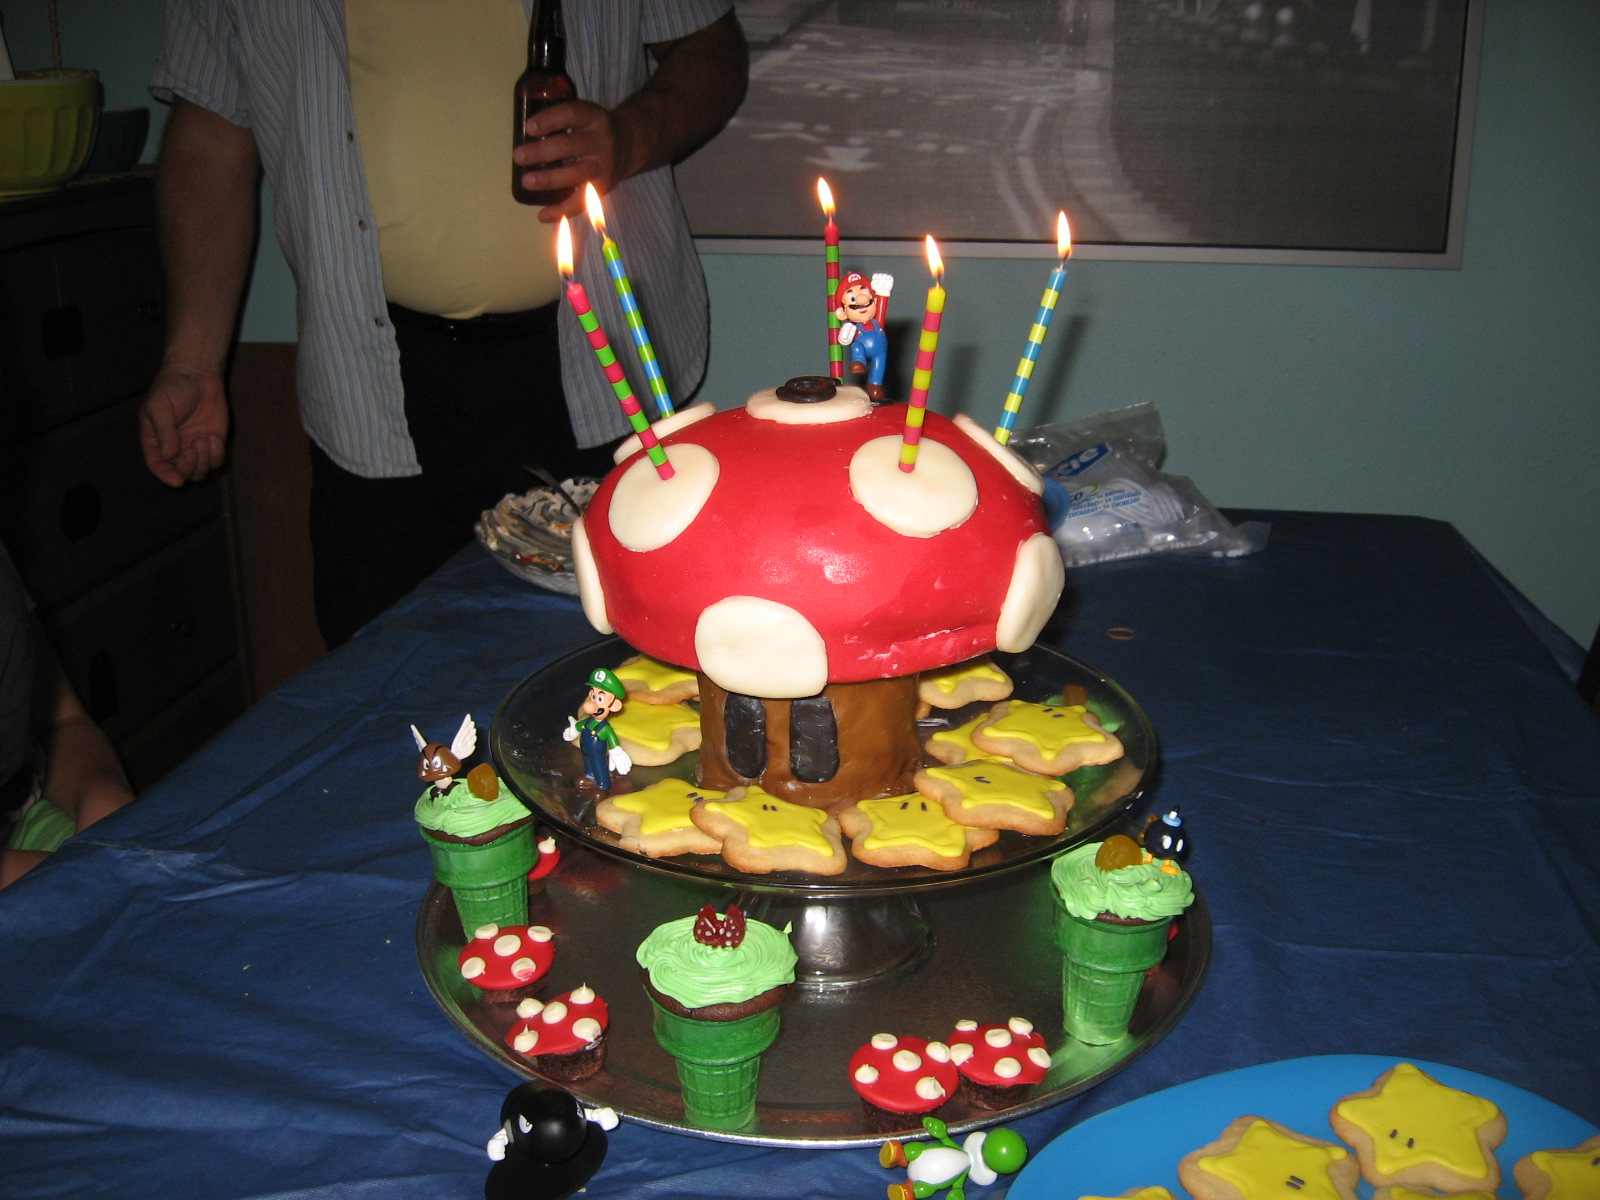
Isn't she the craziest? I supplied the fuel (margaritas) and she went to town for hours... and for her first cake? Amazing! Thanks auntie!!

A few other things we made (I assisted with these guys!) Cupcakes baked into ice cream cones... the idea is for them to look like those little green pipes from the game... we added some "gold coins" and those flower things to the top, I think it worked.


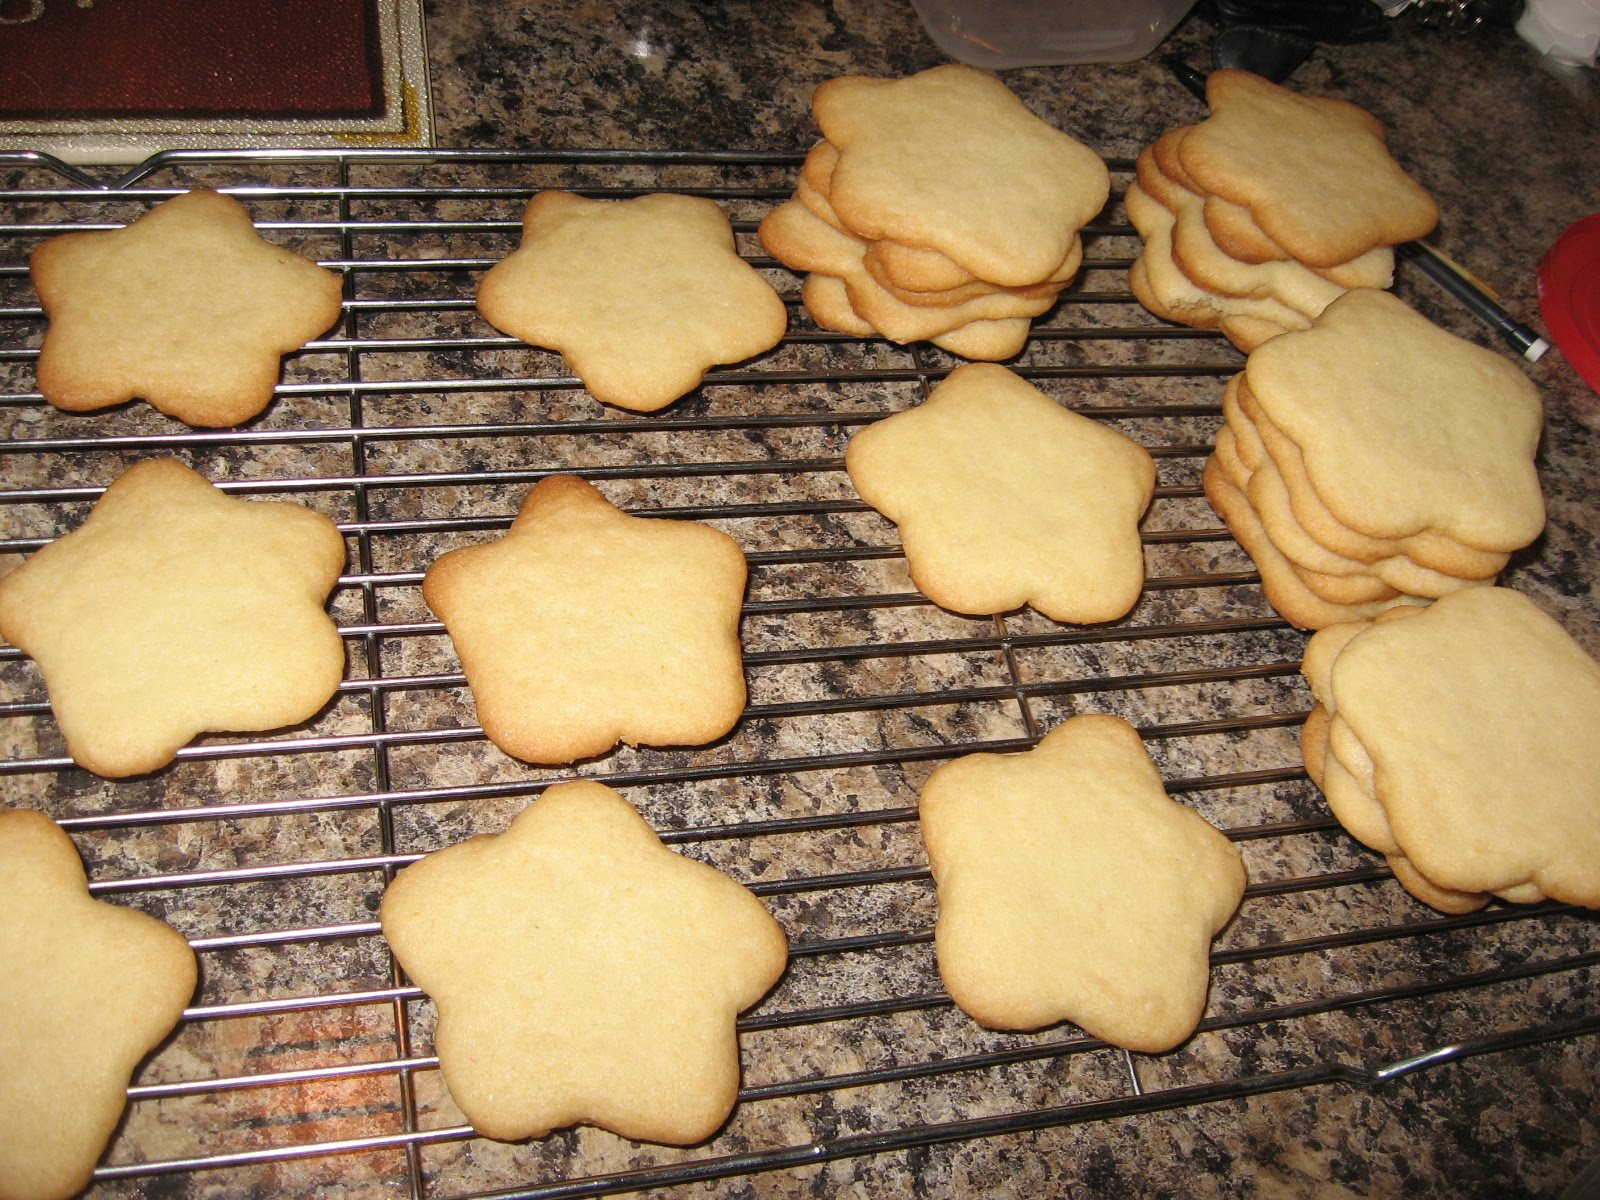
My sister in law baked the star sugar cookies and then we had a little sugar cookie power icing happening at about 11pm. The two aunties and myself had these babies done in maybe 20minutes. I think they turned out pretty darn cute!


In the end we had one happy small mister Five Year Old. *faints* ... So I think we did pretty good!


The rest of the kids left with a little loot bag/ party favor I put together the morning of the party. Michael's had 2 cups for 75 cents - I filled each with a big balloon on an elastic, mini bubbles, glow bracelets and Super Mario gummy snacks and the loot bag staple: stickers. I think they looked great on the kids table!

Thanks for looking today!

Sunday, August 8, 2010

All the cute things...

All the cute little projects I see online seem to be little girl focused. Have you seen those cute little pillowcase dresses this summer? So cute.... (have I used "cute" enough yet?) I don't have a problem with this, I just don't have a little girl, and somehow I think small mister would not be so excited about a pillowcase dress....

Screw it. I'm making it. :P


My version of the Pillowcase Dress tutorial.


1. Find a pillowcase... I went to the goodwill and got one that was a great thick cotton with a sweet print for only a buck. Sold.

2. Cut it up! I needed to shorten it up a little so I left the open end alone (for the bottom hem of the dress) and cut off a few inches from the closed end. Oh, and cut a little curve out of each side for the arm holes (you could use a shirt you love to get the right shape... but it's not necessary).


3. Sew a quarter inch hem around the arm holes and across the neck. (Look how fancy my nails are today.... woo!) Then I fold the arm hems in once more about 1/2 inch just to prevent any fraying and what-not in the wash.


4. Fold down the top inch of the neck and sew straight across, leaving the sides open to thread through the tie or ribbon you choose to use... hmm I missed taking a picture of that step. But here you can see the hemmed and sewed top and armholes. Once that flap is folded over and sewn you are done! (unless you want to mess around and embellish it... then keep reading!)


Here I used a piece of that top bit I cut off at the beginning - I cut about a 2" wide piece and sewed a straight line up the edge. I wanted a matching tie closure... for some reason. (Turning that right side out took longer than the entire dress up to this point!! in other words... use could just use a ribbon).


Then I took little scraps and some ribbon and just ran the sewing machine over it randomly to make bows and flower like shapes... I also took some ribbon and ran it through the sewing machine to add some trim to the hem of the pillowcase/ dress.


That's about it!