Showing posts with label tutorial. Show all posts

Monday, April 25, 2011

I'm gonna wash that dog right outta my car!

So last week I paid the hard earned monies to have a person come and clean my car. Before I had a big ol' dog if someone told me they did this I would have thought this was a colossal waste of money, and also though they were lazy. I mean it's a car, not a palace, how long could it take to pick up a few old french fries from under the seat, wipe out the cup holders and vacuum up some dirt. Big whoop!

Then I got a dog. A fluffy, furry, 70lb ball of shedding and often stinky damp fur.

Do not let the pretty face fool you. Holly here is no pretty little lady. No. She swims in the river, or is content to roll in any puddle that is slightly damp, in other words... mud. When we take her to have her cleaned (or tackle it ourselves) her first instinct is to run directly to the nearest pile of dirt and roll in it. For real. Little boys dream...  that's for sure.

So after one long winter hauling around my girl holly in the back of the SUV that thing was starting to smell like a kennel. A kennel full of damp muddy dogs. So I threw my hands in the air and said "that's it! I'm calling someone! This car is disgusting!" - A few hours later, I got back an SUV with nearly zero dog fur in it.... and it smelled like strawberry Pez... bonus! I am never letting that dog in here again!!


Poor Holly... she would be so sad. So, plan B - get a cargo cover to keep the hair manageable and the stink washable!
But some of these things go for over $50. It's a freaking blanket secured to the car!!

HOLY CRAP. It's a blanket secured to the car!!!

SO I went and got a blanket for $5 that is ugly as ugly can be... because I really wasn't sure it would work... and draped it across the back of the seat and over the flooring of the cargo. Taking note of the spots where I could secure the blanket, and marking it in the spots I planned to add a scrap piece of ribbon.


Then I sewed the ribbons scraps on... I mean no one is going to see the underside of this thing... and it's for the dog to rub it's dirty feet on. Let's keep things real here, old shoelaces would be acceptable here.

I also marked on either side of the headrests because I figured I could either attach a long piece of ribbon, or a Velcro loop, or elastic to loop over the top of it and keep the back of the blanket fully covering the upholstery in the back...  Because... miss manners also drools all over the side of the seat. Yuck.


In the end, after about an hour or marking tie placement, running around finding scraps of ribbon, and sewing the ribbon and elastic in place I had this:


Gotta love that vote of confidence right? This is why I do this people... this is why I blog...  you guys might actually care! ha! Stinker...
Anyhow you can see that there are about 6 ties on there, and you can't see- but two elastic loops at the top to hold the blanket up around the headrests. The only thing left to do was tie in the back of the SUV and see what the critics thought.


Seems to do the trick... in fact....
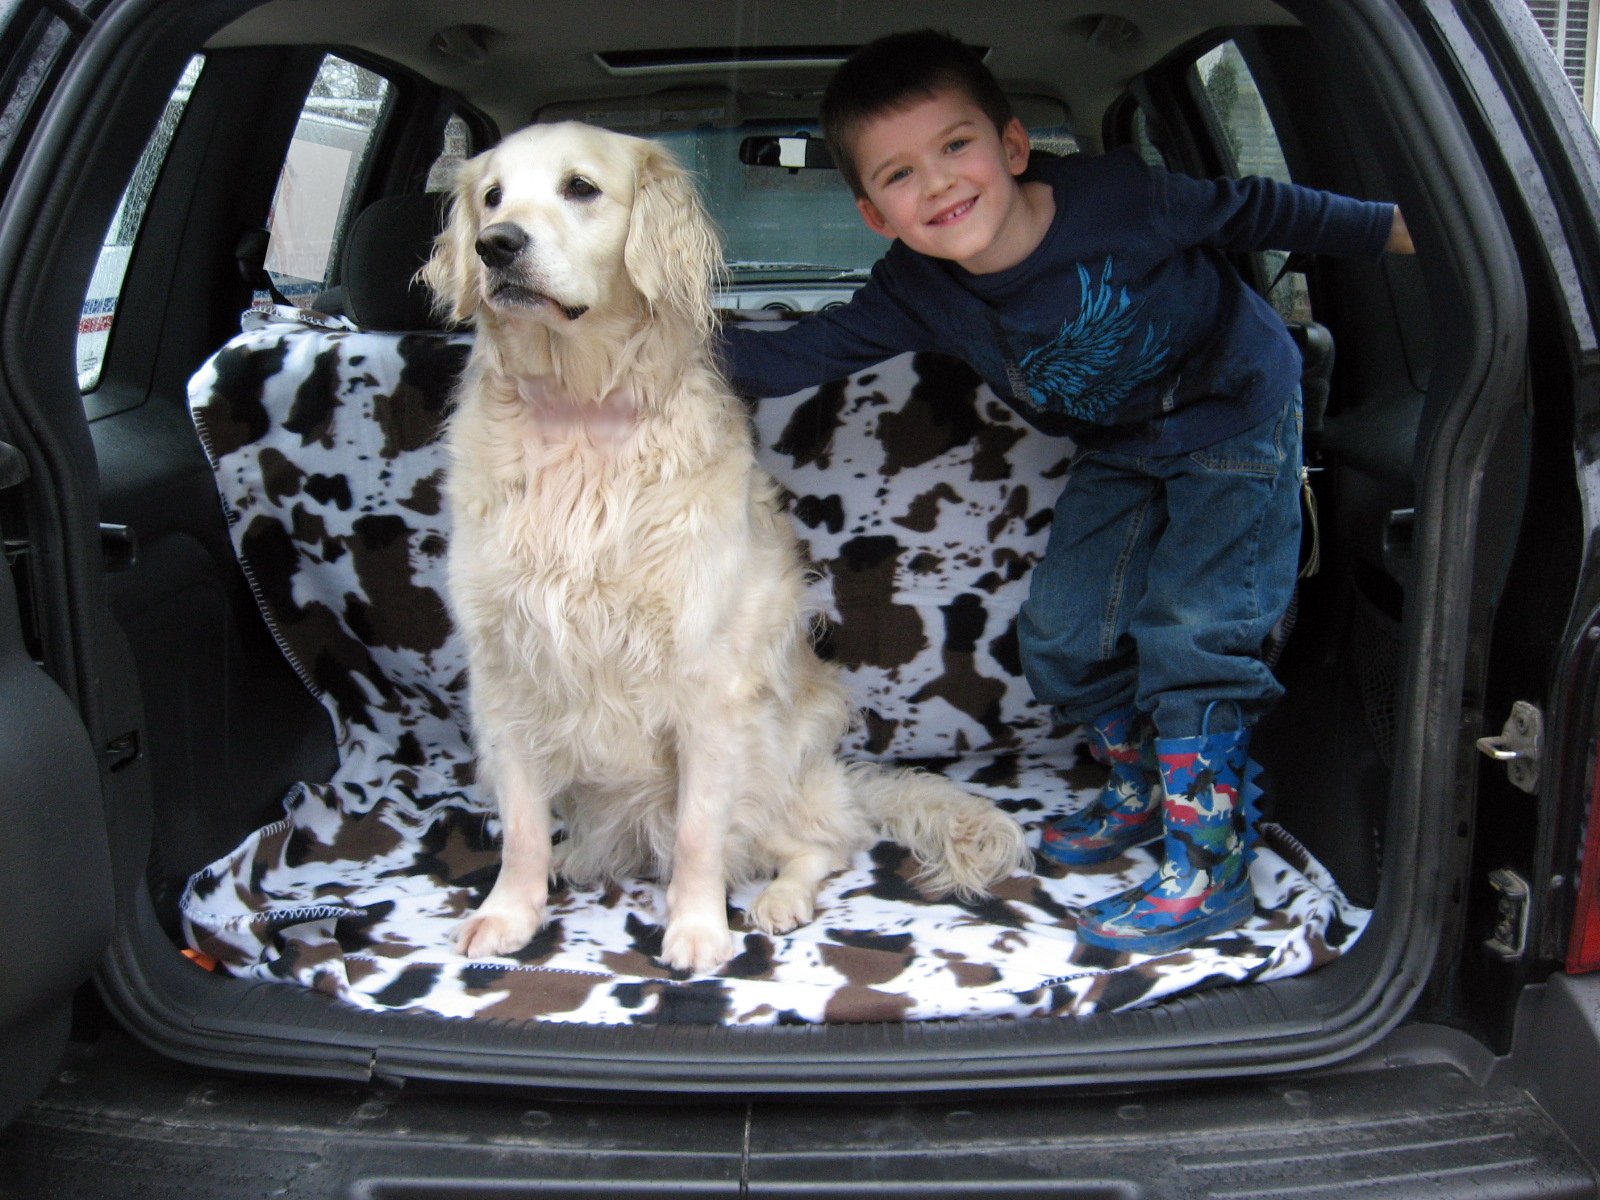


This could keep my back seat cleaner too... heh heh... bugger. Note how UNIMPRESSED the dog is?  When he got in she knew her chances of a car ride were over. Or, she is also wondering what is up with the... cow? camouflage? whatever that is print going on back there. Maybe she felt all ninja... like we can't see her back there now. *snicker*.
But I digress - $5 cargo cover! Yay!


Friday, April 22, 2011

I promise I am still working on that craft room. I feel like with all the non-reveal posts about it you guys are going to be expecting serious fancy pants work. Nope. I'm just slow... easily distracted... indecisive.. oh, and cheap.

Speaking of cheap and the craft room, let me show you my silly little pen, paint brush, screwdriver holders. Hmm, could use another coat of paint. Oh well. Can you guess what it is?


It's an old Pringles can. I just cut it in half and made simple little designs on them with puff paint.


By the way, don't touch the puffy paint before it dries... what a mess. Not that I would do such a thing, I'm very precise... careful...


UGH. Right.

Anyhow let that crap dry and then add a quick coat of primer. I don't know if it's necessary, or worth it, but I wasn't sure of paint would adhere to the puffy paint, and I knew it would scratch off the metal can easily. So I hit them with a quick spray before I set to painting them.

I'm pretty happy with how they turned out - for the most part. Ok. I hate the metal can. It looks like a can painted pink - and I cut my finger on the lip... so that needs to be addressed, or recycled. But otherwise I think maybe a coat of sealer over the old pringles can and I have something that is not so precious that I am going to be sad if it gets marker or paint all over it.


Plus if I get bored with it, I just have to eat share a can of Pringles. Win-win.

Friday, October 15, 2010

Twine Pumpkin

So yesterday I took on a very low work project... a twine pumpkin. Took about 30ish minutes... tops.

Here's how that went down:


Small boy not included in supplies... he's just cute decoration. (Note the jammies? This was at 5pm yesterday... when we got home from school he decided we might as well get comfy.)

Then you add some larger twine to the mix...


I had a little green raffia in the bin of random things so I made a sort of leafy, vine top on it. I made it curl by using a lighter (carefully!) and melting bits of it and twisting it.

It looks big in the pictures but it's only about 5 inches in diameter.
Note to self - 5pm is a bad picture taking time... oh well. Better than nothing I hope! 

Sunday, September 12, 2010

The Never-Ending Side Table

A long time ago I decided I needed a side table or a night stand for the bedroom. So I purchased a little cheap thing that looked OK and did the job. Something like this one from Walmart:


Then after a few years, and a few forgotten water glasses, and baby bottles the table was looking a little bit rough and worn... and well.... cheap. So I thought about replacing it, but thought I might hold out for a new bedroom set instead. Then I realized that my 65 year old house was not built to hold a big bedroom set of today and we would never have the two-nightstand-queen bed-dresser-hutch combo that sort of defines "bedroom set".  So I decided to just work with what I had and try to make this table with the sad top shine again. I have a couple tables with these sad tops, I think it's because I am the only female in this house! Coasters are not indoor Frisbees. They are for preventing this:


There was an obstacle to making something out of this table... It's not real wood. So painting the top would be a challenge because it would only chip and flake like it did before. SO I went with something a little more durable, and water friendly. Tile.


I bought a 2 sheets of tile from the local home improvement store, some rubber cement
and a tub of ready to use grout (no mixing? yes please!) and went home to get creative.

Turns out tile requires patience and maybe even a ruler... I could locate neither. So I slapped on the sticky like I have never seen sticky cement and placed my tiles.... a little off kilter. Crud. Then I grabbed my handy rubber special grout float... basically a grout squoosher inner.


OK, OK... I used the letter N from my kids foam bath toy set. Same diff. ;)

Then I remembered I wanted to paint the table. Le Sigh. Should have done that BEFORE messing around with all that tile. So I covered up the tile, took this bad boy outside and spray, spray, spray. Wonderbar.
Then I determined that tile and  fake wood is an ugly edge and ran back to that old faithful home improvement store and got a length of fancy trim. My husband took it downstairs and cut all the pieces perfectly. Then my dad used some other kind of power tool to attach them all. Some day I will get over my fears of power saws and air tools.
All that work for a crappy cheap side table. (That I am not that in love with... it's still.... meh, I need more practice with tile... and perhaps patience would help. Oh while I am at it I would like the ability to start and finish a proect in one day or less. ha!)