Showing posts with label holiday. Show all posts

Wednesday, April 20, 2011

Nest

I came across this cute idea to make little nests out of chow mien noodles and marshmallows on Our Adventures in Home Improvement the other day. Unfortunately it stuck in my head, and the next thing I knew I was smushing the sticky goodness into muffin tins to make 24 of them for the Small Misters kindergarten class.


I am not sure if there is a trick to keep from burning your fingers off, but they are pretty adorable, right?

I'm so glad I am just dropping them off and not sticking around to witness them all eat the eggs and toss the nest... or to see the sugar hit 24 tiny bodies at the same time. *snicker*


I think my kid made that cute little bunny treat holder in the background... I'm not sure. It came home in his schoolbag and I said "Did you make this? It's so cute!" and he said "I know! pshew pewpew" and continued on fighting evil or imaginary bad guys of some sort. Boys. Total head scratcher.

The recipe (which I doubled to make 24 nests) is very simple:
4 cups chow mien noodles
1/4 cup butter
2 cups mini marshmallows
I also added a tiny splash of vanilla.

Melt the butter and marshmallows over medium heat until melted, stir in the chow mien noodles - muster the courage to handle hot marshmallow and stuff it into the muffin tins so it (hopefully) looks like a nest.
Easy!

Spring on...

Last weekend it was so lovely that I took my new fancy dual temp glue gun outside to craft.

Let's have a moment for the glue gun... and say goodbye to burned fingers!

I can now glue my brains out without melting foam. Wait...  you know what mean. The low temp means foam won't melt... not that it is in my brains. Probably a debatable topic...

Moving on...

So you know those foam balls that go on sale around the holidays that you buy a bag of, but use... maybe 3. Take one of those and have your self an egg carving party.


Or.... don't risk slicing your fingers off, and just buy a freaking egg shaped piece of foam. Easy Peasy. Why do I do these things? Oh... I'm cheap. Right.

So then you take a bunch or two of crappy dollar store flowers and pop all the flowers off.

But first, take out your heavy duty scissors and try to cut them off.... *snicker* I mean really? What am I thinking sometimes? Dollar store flowers? High quality stuff, the flowers aren't just going to pop right off...
Heh....

So then you take your flowers and poke them into the foam egg with a little blob of fancy new low temp glue from the fancy new glue gun.

YAY for getting my craft on outside! Don't worry, I was reminded I lived in the tundra by the next weekend, when it snowed. There is really nothing like scratching mosquito bites while watching the snow blow around... makes me feel... oh... Canadian.

Anyhow - cute right?


Not my mucky dog path of a back yard... the cheap flowered egg... thing. So what can you do with this thing?
Place settings - just set them on an egg cup...


Or.... mimosa glass if you are like me and despise eggs. Blech.  Eggs. Grody. However, booze for breakfast, that I am all over.

Or you could shove a skewer up its bottom and topiary that egg.


Oh and yes - the bottom of my flowery egg has leaves on it. Which worked out OK.... considering I totally ran out of flowers. Shh... our secret.


Three cheers for the dual temp glue gun, and no burned fingers!

I was just saying to a friend today that this might be a sign of age, there are certain things that get me cranked up now that never would have made me blink 10 years ago. The price of gas, snow in April, cheese on sale, and adding to that list dual temp glue guns. Yay! Glue guns. Snow? Opposite of yay. Boo.
Go make some flowered eggs people, give them to your kids teachers... and if they turned out crappy say your kid made them. Ha...

Monday, February 14, 2011

Act 1, Scene 4

You are a lover; borrow Cupid's wings,
And soar with them above a common bound.
Romeo and Juliet, Shakespeare


Happy Valentines Day! I hope you are all enjoying today and reminding those you love just how much you appreciate them. Maybe heart shaped pancakes or sandwiches, a favourite meal, a sweet note, or a simple "I love you".  I like the sweetness of this day, especially since I had my son. It turns out the best gestures are the least grand, for me anyhow. 

This wreath is what came of the left over pine cones and feathers from the swan ornaments I made during Christmas. Work with what you have, right?

Wednesday, February 9, 2011

Zing! Went the Strings of My Heart

When I was trying to come up with something for Valentines I didn't want to go the pink route so I looked into the craft drawers and decided to come up with something that I already had. I bought two fat rolls of twine ages ago at a surplus store ages ago for maybe $2 or less a roll.  Today I am making another heart... and I am a fan of using the twine to do so. It's kind of country, and that's not usually how I roll, but for Valentines day - what the heck? This is another cheapo project.

I cut some cardboard into a heart shape (traced a cookie cutter... I wanted them to all be the same size)


Then I busted out the good old glue gun and starting from the outer edge of the heart I covered the cardboard with the twine. It takes some time, but then that all depends on how many you make, and how thin the twine is.

You could hang loops on the back to hang them up, or you could glue twine to the backs to create a garland like I ended up doing.


These would make cute gift tags... or valentines if you felt so inclined!


I'm linking up over at:

 http://linda-coastalcharm.blogspot.com/monogram

Tuesday, November 30, 2010

Seven Swans a Swimming...

So, originally when I thought I might craft up the seven swimming swans, I thought this might be a cute kids craft...  I remembered making these with a babysitter when I was young and my parents were at a work holiday party. Then I started making them, and let me just say... I think my babysitter was on crack. Oh well, it was more than twenty years ago, and maybe it would be OK for older kids. My five year old son was not interested. Little kids could wind up the pipe cleaners, and paint the pine cones.

So, gather up your supplies and your glue gun.. and your heat resistant fingers.


Then you begin by curling up about half of the pipe cleaner...


Then you curl the rest into an oval to fit on a pine cone.... 
But don't glue it on yet! First you will want to select the feathers for the tail, two to three will be lots. You can cut the longer ones down if you like. Then you glue those on.... Oh, and hot glue and feathers? This is why this is not a craft for children. Ones you actually like, anyhow. Ouch.


Then you attach the pipe cleaner... more hot glue and feathers... yay! *cry*


Then you are done!


Unless you want him to have a face... then you take a toothpick, color the end orange, cut it off and dip it in sticky lava hot glue and attach to the pipe cleaner. Cute!


That's it!

 Unless you want 6 more...


Tuesday, November 16, 2010

Two turtle doves...

So! This is a fun one, totally doable with little kids and works into the attention span of most non-bakers. I'm not much of a baker. Generally speaking my cookies are pre-formed by little a dough man with a ticklish tummy... know what I mean? I make muffin tops because the butts don't come out of the pan. True story.

But this is the easiest thing ever.  Lots of people probably make it in some form or other.

Just, use your imagination on how it fits into the 12 Days of Christmas theme, please.

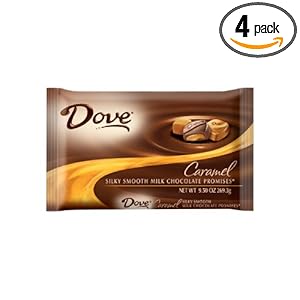
The ingredients are little pretzels, pecan halves and dove caramels.


What's that? Rolo's? Oh... this is where your imagination comes in. Pretend they are Dove Chocolate Caramel Promises. From here on out when I say "Rolo" you think "Dove" - otherwise this entire post makes no freaking sense. (I couldn't find the dove chocolates anywhere, I hobbled to 3 stores... no dove. Sadness!)

So to recap... Rolo -

Via Amazon


Moving on.

Lay out as many pretzels as you have Dove... or Rolo on a cookie sheet covered with a silicone mat. Preheat the oven to 240 and start unwrapping the chocolate caramels. Place a Dove Rolo on each pretzel and pop into the oven for about 4ish minutes.  When the chocolate caramel is still warm and a tiny bit melty you pull them out and place a pecan on top and squish it down.

Like so (woo! action shot!)


The you just let them cool until you don't burn your mouth off.  (Also you thank me for suggesting the silicone mat... you're welcome!) 

And they look like blobs turtles! Turtle DOVE.... get it? (Remember... imagination... heh heh)


Recipes Of A Cheapskate


Monday, November 15, 2010

A partridge in a pear tree...

I am so excited to start my "12 Days of Christmas" holiday themed blog posts with you!  I am back up on my feet (mostly!) and getting things done around here.

I thought long and hard over ALL 12 days of posts I would share with you and this was by far the easiest one. As you probably know a partridge is a bird... like a grouse or maybe a pheasant that people eat... but I am not into that so I thought that maybe it would be fun to do something with pears and partridge berries!


Via Wikipedia
Do you know what partridge berries are? Most people don't, but it's a berry found growing wild in places like Newfoundland... or Sweden. I bet you have likely seen something called lingonberry jam at Ikea. They have it with their meatballs? It's partridge berry jam! 
Via Ikea
But.... partridge berries are also hard to come by where I live, so I went for the next best thing and got some fresh cranberries. It's the same tart taste, but they are quite a bit bigger than a partridge berry.
I got a recipe for my first go from the maven of making stuff.... Martha Stewart.  Her Cranberry-Pear Crisp is super yummy, the cranberries sing "happy holidays" right into your heart... via your mouth.


Then I think I did it one better, I omitted 2 pears and subbed in two empire apples... Plus I forgot the lemon... oops... but really I think it's just to keep the fruit from browning.


So this is the point where you make the crumbly but crisp topping.... but don't forget to add that little bit of sugar over top of the fruit before you add the topping. Like I did.  Or you will find your self carefully moving the topping aside and adding sugar bit by bit.... like I did. Nothings perfect people.


Weird! I took it out of the oven and the dish was square! No. OK. So what happened was, after looking at the top dish we all decided that the crumb topping would never ever fit on top... so it got transferred. Cooking at my parents house is a democratic event, folks. I bet this is when I forgot the sugar! Anyhow, doesn't it look amazing?


What's that on top? Oh... that is a post for another day... trust me, it's worth waiting for!


Friday, October 29, 2010

Haunted Gingerbread Houses

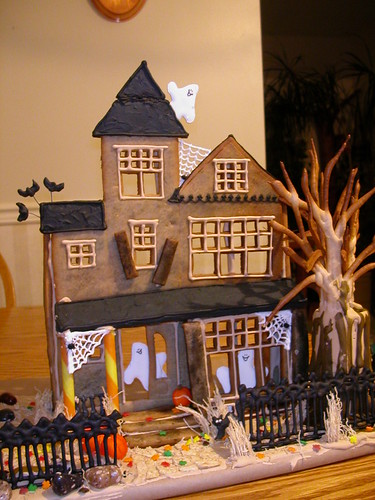
Have you guys seen the kits at Micheal's for the Halloween gingerbread houses?

Truth be told, I thought it was just silly.... we do them at Christmas, so I am not so sure what I thought was silly about having some fun with this around Halloween.

Then I came across this masterpiece by Marion from Sweetopia.

Via Sweetopia

Is that not the coolest thing you've ever seen? I am inspired to make a gingerbread house! Not sure if that will happen, I seem to have a bit of an impromptu Trick-or-Treat party happening at my house. IF I don't get time this year I am making a mental note for next year!

If I don't get to post tonight - Happy Halloween - see you Monday!

Monday, October 25, 2010

As promised...

Well, here is what all the hinting was about...


I think it's just the cutest, if I do say so myself. I was thinking that I wanted to do a sort of pillowcase dress that was wearable in the fall, for those of us in the colder climates. I went looking around at pillowcases, and thought maybe flannel, maybe denim and then it came to me - I ask you, what is cosier than polar fleece?

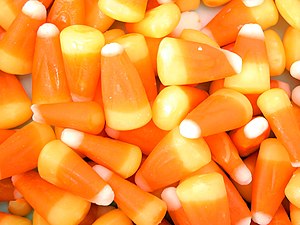
What is more fall/ Halloween / festive than the orange, yellow and white of a piece of candy corn?


 I didn't use a pattern for this as it is meant to be as basic as the pillowcase dress... so here is a sort of step by step guide.

First take a picture of your fabric.


Just kidding. I don't even know what I was thinking. Wooo.... fabric. But you will need fabric and some kind of closer, I opted to not do the ribbon ties because I felt it would be too bulky, so I got some snaps.

Cut your fabric to the width you require. Then, because I used three colours, sew it into one large panel.

Once you have your panel you sew the sides together, pin the hem, and cut out an appropriate shape for the arms and neck. You could use a shirt or dress yoo already have as a guide.


You are almost done! All that is left is the 1/4" hem along the raw edges of the arms and neck - then you can add pieces to make the straps longer if needed.  Once you are all done with the hemming all that is required is to add the snaps or buttons!
(and have you sweet husband take a shaky picture of that step - this is crucial. ;) )

All done! Let's see that cute dress again OK? A little white long sleeve shirt, and tights... cute!


Enjoy!

Sunday, October 24, 2010

Tomorrow... promise


So between the pumpkin patch, the soccer gear shopping, and the Halloween costume hunting I was out of gas when I got home today. Which means I didn't get the project quite finished.
But since I had a 2-fer yesterday I felt like I deserved a freebie, no?

Tomorrow I have a super cute project to share, I'll even have all the directions for it. Yes. Really.

A hint? OK OK, twist my arm...


via Wikipedia

Seriously - that's the hint. It's going to be cute! I have a vision!

Friday, October 22, 2010

Another Pumpkin?

Absolutely. What is Fall without pumpkins made of things that are not pumpkin? Well... it's just not fall. Right?

While I was making my twine pumpkin I thought, you know what might have the same rustic, rough "feel"? Burlap. So while I was at the dollar store grabbing some googly eyes I also picked up this bulapy-ish type of stuff to give it a shot. I don't have any instructions all laid out for this, because honestly I didn't think it was going to be as cute as this in the end.

If you read the post about the twine pumpkin then it's the same start - cover foam ball in batting. From there it's fabric and this weird papery burlap stuff, twine for the pumpkin ridges and fabric for the leaves.  Nothing too finicky. Considering I thought this whole project as going to be a big fat bust in the end, I am pleasantly surprised!


Thursday, October 21, 2010

A little more Boo for your Buck?

So here is what I came up with to spookify my front porch: silver spray painted skulls and some twigs.
Done and done!

I got these guys at the dollar store (I should consider buying stock there...) but I didn't like the um... authentic brown aged look of them. Too scary... doesn't scream Happy Halloween!!

I prefer disco skulls. I achieved that look with a little help from some handy dandy spray paint from the hardware store. We've all done the glittered pumpkins by now, or talked ourselves out of it (so messy!) many times... silver spray paint I can do.


The small mister is loving it. I'm pretty happy with it too especially for it being a buck or two, plus it's not all in your face skulls and dead stuff. Not that fake scary graveyards and all of that isn't pretty cool. I'm just a big fat chicken who has only seen 3 scary movies, through my fingers, with my head under a pillow. I'm that girl who used the phrase "disco skulls" - I'm OK with that!