Friday, October 29, 2010

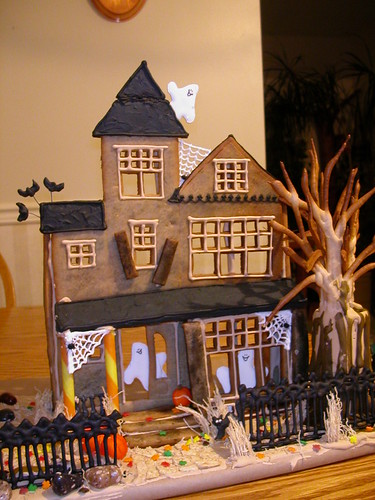
Haunted Gingerbread Houses

Have you guys seen the kits at Micheal's for the Halloween gingerbread houses?

Truth be told, I thought it was just silly.... we do them at Christmas, so I am not so sure what I thought was silly about having some fun with this around Halloween.

Then I came across this masterpiece by Marion from Sweetopia.

Via Sweetopia

Is that not the coolest thing you've ever seen? I am inspired to make a gingerbread house! Not sure if that will happen, I seem to have a bit of an impromptu Trick-or-Treat party happening at my house. IF I don't get time this year I am making a mental note for next year!

If I don't get to post tonight - Happy Halloween - see you Monday!

Tuesday, October 26, 2010

Pumpkin Biscotti

I love biscotti... love it. Once I figured out how to make it and realized it is not brain surgery I wanted to make every kind of biscotti I could think of: orange cranberry, chocolate chip, mint chocolate... etc.

So the other day I got the idea to try and figure out a pumpkin spice biscotti... with a glaze of some sort. Sounds yum right?


Here is the recipe I used:

2 + 1/2 Cups flour
1 + 1/2 tsp baking powder
1/4 tsp salt
1 tsp cinnamon
1/2 tsp pumpkin pie spice
1/4 tsp ginger
1/8 tsp of nutmeg... a dash... basically
1/2 cup pumpkin puree (honestly I took a heaping scoop from the can with the 1/2 cup measure.)
1/2 cup white granulated sugar
1/4 cup brown sugar
2 eggs
1 tsp vanilla
1/4 Cup chopped pecans

Mix together all the dry ingredients and set aside. Beat pumpkin and sugar until light and fluffy and add in eggs and vanilla. Gradually add in dry ingredients and incorporate well.  A stand mixture is the best for this... biscotti is a really sticky dough.

Divide dough in half. Shape each half into a 2" wide log and place on greased cookie sheet. (Or parchment paper)

Bake 20-30 minutes in preheated 350 F oven until lightly browned. Remove from oven and let cool on cutting board for about 10 minutes (until it's cool enough to handle). Slice on an angle into about 1 inch wide pieces you'll want to use a serrated knife for this. Place cut side down onto cookie sheet and bake for 20 minutes longer at about 325 F until cookies are dried  (flip it over the biscotti during the last five minutes). Place on wire racks to cool. You can leave it out to crisp up overnight if it's still a bit chewy and you would rather a crisp cookie.

After the taste test I figured a sour cream glaze went best with it - so here's how that goes:
1/2 cup sour cream
1/2 cup granulated sugar
1/2 tsp baking soda
heat everything in a saucepan until boiling and then just dip the biscotti in and let set.

I'm telling you - this is delish!

*added note:
So... the glaze does NOT set. In fact it makes it soggy. Sadness.
Skip the glaze people, skip the glaze.

* found the glaze over on Our Best Bites that will do the trick!


Recipes Of A Cheapskate

Motivation?

Have you ever started a project and thought to yourself "oh no". Well let me tell you, making a quilt is nothing to sneeze at. First you have all these little pieces to cut out, then you start sewing, and sewing and sewing, and then you realize that this might take longer than an evening or three to complete.

Red Pepper Quilts

Via Red Pepper Quilts


My journey began with an idea to turn Super Mario into a quilt. As you might remember we have a bit of a fan of Mario in this house. My journey began about 6 months ago. Not even kidding. I was on a roll, cut all the squares, started sewing the squares together, had a few lines done... then pfft. Lost interest.


Via Red Pepper Quilts


But the leaves are falling, my oven is rolling out soups and chili and pies (also lots of smoke, what is up with that??) - cooler weather is approaching. With cooler weather comes cozy blankets and fluffy sweaters, and hot chocolate. Mmmmmm. So my attention returns to that quilt I started and tossed aside. It won't be as lovely as those featured on Red Pepper Quilts, my goodness she is talented! I have no idea what I am doing, and I'm OK with that! It's a journey... a learning experience... a bribe so my kid thinks I am cool... you know, the usual.


Monday, October 25, 2010

As promised...

Well, here is what all the hinting was about...


I think it's just the cutest, if I do say so myself. I was thinking that I wanted to do a sort of pillowcase dress that was wearable in the fall, for those of us in the colder climates. I went looking around at pillowcases, and thought maybe flannel, maybe denim and then it came to me - I ask you, what is cosier than polar fleece?

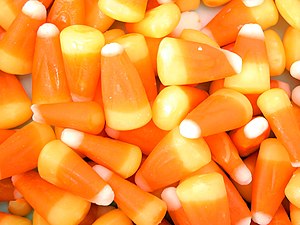
What is more fall/ Halloween / festive than the orange, yellow and white of a piece of candy corn?


 I didn't use a pattern for this as it is meant to be as basic as the pillowcase dress... so here is a sort of step by step guide.

First take a picture of your fabric.


Just kidding. I don't even know what I was thinking. Wooo.... fabric. But you will need fabric and some kind of closer, I opted to not do the ribbon ties because I felt it would be too bulky, so I got some snaps.

Cut your fabric to the width you require. Then, because I used three colours, sew it into one large panel.

Once you have your panel you sew the sides together, pin the hem, and cut out an appropriate shape for the arms and neck. You could use a shirt or dress yoo already have as a guide.


You are almost done! All that is left is the 1/4" hem along the raw edges of the arms and neck - then you can add pieces to make the straps longer if needed.  Once you are all done with the hemming all that is required is to add the snaps or buttons!
(and have you sweet husband take a shaky picture of that step - this is crucial. ;) )

All done! Let's see that cute dress again OK? A little white long sleeve shirt, and tights... cute!


Enjoy!

Sunday, October 24, 2010

Tomorrow... promise


So between the pumpkin patch, the soccer gear shopping, and the Halloween costume hunting I was out of gas when I got home today. Which means I didn't get the project quite finished.
But since I had a 2-fer yesterday I felt like I deserved a freebie, no?

Tomorrow I have a super cute project to share, I'll even have all the directions for it. Yes. Really.

A hint? OK OK, twist my arm...


via Wikipedia

Seriously - that's the hint. It's going to be cute! I have a vision!

Saturday, October 23, 2010

Wall hanging - part two... and three!

My goodness people, I was featured on One Pretty Thing yesterday, talk about exciting - especially for a new blogger such as myself. So, to any new people who came back today - welcome, thanks, and I love you a little bit!

Today I have part two and three of the functional, but cute wall hanging I have in the works for a friends little girl. Both involve old frames, paint and cute fabric.

Oh... just kidding - that's not the paint I used... hmmm. It was the Krylon celery for one, and a bright sunny acrylic paint for the other. It's good I'm on my game like that.

The first is a simple, so simple it hurts, wipeable memo board.
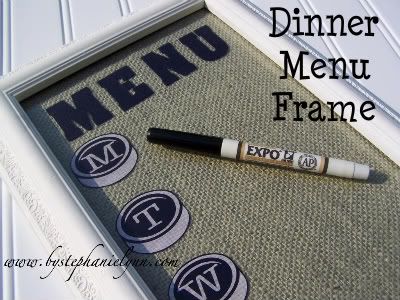
This is just a cheap Ikea picture frame, with fabric inside. Really. That's it. You can use any old washable marker on there, and it will wipe right off the glass  - no sweat. I thought this is a great thing for friends to leave notes, or mom to write reminders on.


The second is a tiny little french memo board... you know how kids have special momentos, movie tickets, special photos, this is a nice neat way to display some, without being permanent. Justin Bieber isn't going to be "it" forever, right?
Also, not hard. There are so so so many tutorials out there for french memo boards. Really. So many.
The idea is to put batting over cardboard or wood, then glue or staple fabric to the back, then glue or staple ribbon or elastic across the board, allowing space for odds and ends to be poked into them. That is it. This one just happens to live in an old picture frame that I spray painted to coordinate with the rest of the pieces.


 It's so nice to make things for little girls sometimes!

Friday, October 22, 2010

Another Pumpkin?

Absolutely. What is Fall without pumpkins made of things that are not pumpkin? Well... it's just not fall. Right?

While I was making my twine pumpkin I thought, you know what might have the same rustic, rough "feel"? Burlap. So while I was at the dollar store grabbing some googly eyes I also picked up this bulapy-ish type of stuff to give it a shot. I don't have any instructions all laid out for this, because honestly I didn't think it was going to be as cute as this in the end.

If you read the post about the twine pumpkin then it's the same start - cover foam ball in batting. From there it's fabric and this weird papery burlap stuff, twine for the pumpkin ridges and fabric for the leaves.  Nothing too finicky. Considering I thought this whole project as going to be a big fat bust in the end, I am pleasantly surprised!


Thursday, October 21, 2010

A little more Boo for your Buck?

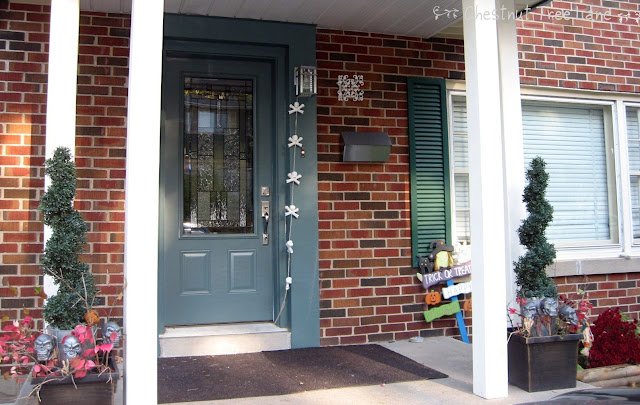
So here is what I came up with to spookify my front porch: silver spray painted skulls and some twigs.
Done and done!

I got these guys at the dollar store (I should consider buying stock there...) but I didn't like the um... authentic brown aged look of them. Too scary... doesn't scream Happy Halloween!!

I prefer disco skulls. I achieved that look with a little help from some handy dandy spray paint from the hardware store. We've all done the glittered pumpkins by now, or talked ourselves out of it (so messy!) many times... silver spray paint I can do.


The small mister is loving it. I'm pretty happy with it too especially for it being a buck or two, plus it's not all in your face skulls and dead stuff. Not that fake scary graveyards and all of that isn't pretty cool. I'm just a big fat chicken who has only seen 3 scary movies, through my fingers, with my head under a pillow. I'm that girl who used the phrase "disco skulls" - I'm OK with that!


Wednesday, October 20, 2010

Wall hanging - part one...

Part one of the decorative (but functional) wall hanging I am doing for a friend is complete!


I took a canvas (yes... from the dollar store) and chose to do a woven covering over it with some satin and cotton ribbon, that way each little square is an opportunity to hang a pair of earrings or clip a barrette. The two purple flowers at the bottom are drawer pulls which are screwed right to the frame of the canvas, perfect for hairbands, and jewellery.
I can't wait to get started on the rest! 
What do you think?

Tuesday, October 19, 2010

An idea...

I was in the middle of fighting with a canvas last night and it hit me... not the canvas, but an idea.

These things happen when whatever I have planned for a project does not turn out as I had expected... at all. So I don't have a "ta-da" for you today. But I do have an idea of a ta-da for tomorrow.

A friend of mine had asked me to come up with some kind of wall hanging for her daughters room. So I went back and forth on a few things... but I finally think I may have come up with an idea! Last night I abandoned the canvas and trying to make it into a hair band / jewellery holder (sort of) and thought about maybe a series of canvases (or possibly frames... hmm) that I could make into something special - and useful. Her daughter is coming into that transitional age so it still has to be fun... here are some inspiration pictures of what is to come.


Anthropologie


La Petite Playhouse


Under the Table and Dreaming - Via: One Pretty Thing


Monday, October 18, 2010

More boo for your buck!

I think we will say that the twine pumpkin was the unofficial kick-off for this El cheapo Halloween decorations.

Today I have for you a project that takes a little time, but nothing too crazy. Maybe an hour?

Here are the basics... ah man, forgot the glue, I used old reliable podge. If you were wondering.


Supply total $2.00. I already the old frame, the glue and the paint. Two bucks for this?


Yes please! I cannot take the credit for this fantastic idea. Prowling the pages of One Pretty Thing for inspiration and to be impressed with the clever people who get there I came across a post for a wreath made from googly eyes. Adorable.

Friday, October 15, 2010

Twine Pumpkin

So yesterday I took on a very low work project... a twine pumpkin. Took about 30ish minutes... tops.

Here's how that went down:


Small boy not included in supplies... he's just cute decoration. (Note the jammies? This was at 5pm yesterday... when we got home from school he decided we might as well get comfy.)

Then you add some larger twine to the mix...


I had a little green raffia in the bin of random things so I made a sort of leafy, vine top on it. I made it curl by using a lighter (carefully!) and melting bits of it and twisting it.

It looks big in the pictures but it's only about 5 inches in diameter.
Note to self - 5pm is a bad picture taking time... oh well. Better than nothing I hope! 

Thursday, October 14, 2010

Sick, real sick. Ick!

My house has been overtaken by a cold bug thing. Gross.

I have been so freaking tired I haven't crafted a thing in days... but tonight I think it's time for some homemade chicken soup. Also I have things in the fridge that have to go... I'm looking at you sad celery.

Via: Apartment Therapy

Here is a great article from Apartment Therapy about cleaning out those sad veggies and using them to make a great stock. It's a really good idea... I am never quite organized enough to get that done, but my intentions are good. One day I will be super woman enough to pack lunches in bento boxes, make every meal from food I farm and harvest, and make every gift, card and decoration in my house.... until then... I'll not feel guilty about buying stock. hee hee.

But, friends - should you feel so inclined it really doesn't look that hard, and I bet it would be great if you were also organized enough to feeze it in icecube trays... then when you just need a little you have it. Or, you could just throw it all in a ziplock and freeze it. You just made your own stock. You deserve a break.


Meanwhile here is my (ummm.... my moms) chicken soup recipe.

In a large pot you are going to place chunks of chicken (or turkey breast) and cook it slowly in a little oil. While it's cooking away chop up some onion and throw that in too. Let it "sweat" as my mom says...
Then add in your veggies (I usually just go with that sad celery and last of the baby carrots, and a turnip)
Pour in a whole box of chicken stock and if you can find it a package of Lipton Soup Works (but pick out the carrots they are yucky) or I think a bouillon cube would do the trick as well.
While everything is all simmering away I like to put in about two big happy tablespoons of barley (it really thickens up the soup) - and you can add your noodles or rice. You should keep a hot kettle on the stove too if you have one - you will need to top it up and top it up with water as it cooks along.
Season as you like with salt and pepper.

Basic list of ingredients:

Chicken or turkey breast (2) cut into bite size pieces.
3 celery ribs chopped
1 small onion diced/ sliced - however you like it.
2 large carrots diced (or about 1 cup of baby carrots sliced)
1 small turnip
1 box of your favourite chicken broth.
1-2 bouillon cubes (or a package of Soup Works... if you can find it!)
1-2 tbsp barley
1 cup of noodles (egg noodles or rotini are nice)
OR
1 cup rice
1-2 (ish)cups of hot water as you cook it down.

This can stay in the pot on the stove all day... the longer it cooks the better it tastes.

Eat and Be Well!
Wednesday, October 13, 2010

Seriously, contact paper.

Contact paper, scissors, an exacto knife and about an hour of time is what it took to make a regular old filing cabinet (that had seen better days) cute.


I'm not going to lie and say it was soooo easy and there were no bubbles or creases... because there were LOTS of bubbles and creases. (LOTS!) But it wasn't hard, and for the couple bucks I spent on the contact paper I figured I wasn't going to be heartbroken if it didn't work out. So I smoothed and smoothed, and I poked pin holes and rubbed out the bubbles... and you can see a crease on the side - but that's OK... people won't see that! ; )  It's our secret.


Furniture Feature Fridays

Tuesday, October 12, 2010

A breath of fresh air...

Except for the paint smell, but that will fade in a minute or ten.

A few months ago I found the most perfect little coffee table on Kijiji for just about $30. It had pretty curvey legs, a glass insert top, details upon details. I had to have it. So I got it.


Check out the brass claw feet! *swoon*

After cleaning years of other peoples dirt off this baby with an old toothbrush, and not having much success getting into all those grooves and details I busted out the dremel. It's was lots of work... really.
But wasn't it oh so worth it in the end?


I think so!

Just because I had to dremel out all those grooves in the top, here's a close up picture of how pretty and clean and soft celery green they are now:

Saturday, October 9, 2010

Sidewalk Boutique

My new favourite store is this amazing local place called Sidewalk Boutique. I tend to find the cutest things there when I am not even looking...

Like this side table:


OK OK OK.... Sidewalk Boutique is also probably called "garbage day" for most people. You got me.
But come on people, sometimes you just have to keep your eyes open and see the possibilities.


A little paint... a little fabric... some elbow grease.... and you have your own very unique, solid wood, clean and shiny, and (minus beautification supplies) free piece of furniture.

Like so...


Curbside.... is now side table.

Friday, October 8, 2010

Nevermore...

Finally I have uploaded the pictures of the crow I sewed up for Fall/ Halloween.

A long time ago a friend of mine shared a pattern for these cute little birdies from a blog called Spool Sewing that had been made into a mobile.  I think I must have made about a dozen of these little guys for Christmas last year as ornaments to give as gifts (I just reduced the pattern to 75% on a copier). I put the pattern away and came across it randomly the other day and thought I should make a couple for my big red birdcage. Then it came to me.... fall decorations.... Halloween.... Crows!!!

So I whipped up one of these guys... and added some wings that I frayed the edges on and sewed a little silver detail on. I have him up in my kitchen for now - but soon I will have a whole murder in my birdcage (remember, bunch of crows is called a murder!)


So he's a little bit disco crow... I'm OK with that.